
Create & Care
Planning and planting your garden and getting your California native plants off to a good start is the first fun step in creating your landscape. Long term care, sometimes called “maintenance” is more about connecting and engaging with your garden than working through a list of chores. As native plants become established and the garden starts to function as a whole, rather than a sum of parts, your involvement becomes that of a steward and participant. You will be tending the garden, not maintaining it. Follow these easy guidelines for success and enjoyment in your native plant garden.
Site Prep
Soil Moisture: Before starting any landscape garden, you need to know that the soil is moist on the day of planting, and that you can conveniently water the plants or the entire area when you finish. This may involve a sprinkler system, but in many situations, hand watering will suffice. Since natives are highly efficient, consider using a portable line of mini-sprinklers connected to a garden hose rather than installing a complicated irrigation system, for the early establishment period.
Weeds: On a brand new site, a crop of healthy weeds is a good sign that the soil will support plant life. You will need to eradicate them, and develop a strategy for weed control, especially during the first few months. There are numerous methods for eliminating weeds, including mechanical (cutting or grubbing), chemical (herbicides), or biological control such as solarization (killing them under a hot tarp) or by turning out a herd of goats. Please check with your local jurisdiction about the goats. If the ground has no weeds, or very meager weed growth, it may be an indicator of difficult site conditions or poor soil.
Varmints: Deer, gophers, rabbits, squirrels, or even certain domestic dogs and cats are able to cause extensive damage to a landscape, especially a brand new one. If you believe that herbivores or other ruckus-causing varmints are nearby and may be visiting soon, you should arrange for their control or exclusion before planting your garden.
Soil Prep
To Amend or Not to Amend: Because native plants are so highly efficient in the uptake of water and nutrients, many landscapers believe that no soil amendment should be used. Others believe that a little organic mulch, blended with the native soil in the planting hole, will help the plant get established. There are no hard, fast rules on using amendments. All agree that you must choose plants that will eventually root into the native soil and thrive under the conditions of the site, since it is impractical to amend the entire area and alter all the soil for all the plants. If you choose to amend the planting hole, use high quality, weed free, organic mulch (i.e.; composted green waste), approximately one-third mulch to two-thirds native soil by volume. Tree of Life Nursery plants are grown in a mix that promotes rooting into the native soils on the planting site.
Fertilizer: If the soil is poor, or topsoil is lacking, you can blend a balanced fertilizer into the area to be planted. For natives, a half strength application will be enough. Many people prefer organic fertilizers because they also contain beneficial organisms and humus that add “life” to the soil. Nutrients are made readily available to the plant as the soil reaches 70°F, so chemical fertilizers will not be very useful in the winter when the soil is cold. Organic fertilizers are slower to show effects in the plant, but nutrients are available at a steady rate over a longer period. There is a downside to using fertilizer, especially if it is really not needed: the weeds will be stronger and more numerous.
Plants from Tree of Life Nursery are raised with the proper nutrient balance to be healthy and vigorous, without being “addicted” to commercial fertilizers. This insures that they will not go into “withdrawal” in your landscape.
Mycorrhizae: Pronounced My-co-rye-zee, this term describes the beneficial fungi in the soil that assist plants in the uptake of water and nutrients. The fungi act like a part of the root system and make the plant stronger against drought and disease, and help it extract the necessary plant foods even in very poor soils. Mycorrhizae are very important to native plants, and the fungi are usually missing in soils on graded or altered sites. Plants from Tree of Life Nursery are produced with high quality mycorrhizae in their root systems.
There are many soil additives on the market that claim to contain mycorrhizal fungi. Only a few are really effective; the properties of the remainder are questionable. Landscapers should be wary of snake oil mycorrhizae products on the market.
Irrigation: If the soil is dry, you should pre-irrigate. If you are planting in the dry season, you can probably sprout a crop of weeds by pre-irrigating and then control them by spraying an herbicide a few weeks before your planting date. If you are planting in the winter or spring, the soil will most likely be moist from the rains. Those are the best conditions for planting.
Planting
Season: The ideal season for planting natives is during our rainy period: fall through spring. Fall planting takes advantage of all the winter rain and allows the optimal amount of time for roots to establish. Winter plantings are good, but sometimes the soil is too wet or the ground is too cold for early plant establishment. Spring plantings are very successful as well, though some attention will be needed as warm weather approaches at the end of the rainy season. The soil is warming up, the daylight hours are increasing, and more rain is probably on the way. If you plant in late spring, you will need to pay close attention during the first weeks of summer, as the plants will not yet be rooted into deep, moist soil. Summer planting can be achieved in areas of mild weather near the coast, in the shade, or inland with more intense care. Planting in late summer, (August/September), can prove a challenge, especially at inland locations. You might be better off waiting until mid-October, when the weather and soil are cooler and the rains are just around the corner.
Technique: It’s all about the hole you dig and the way you handle the live plant. As a general rule, the hole should be larger than the root ball of the plant. An old rule of thumb is “twice as wide and half again as deep.” Make sure the sidewalls of the hole are not smooth like a bathtub. Roots will be more likely to penetrate the soil outside the hole and won’t coil round and round in the hole if you make rough, irregular surface walls. With the oversized hole, you will have a nice pile of dirt on the side, called the backfill. Break big clods and remove big rocks. You can blend one third organic amendment with two thirds soil in the backfill, or add organic fertilizer to the mix if you like. Put water in the hole and watch how fast it percolates into the soil. If the water stays for many hours, you know you have clay.
Estimate or measure the height of the plant’s root ball and build a little mound in the bottom of the hole, so that when the root ball is set atop the mound in the hole, the collar (the spot the main stem meets the soil) will end up being about one inch higher than the surrounding grade.
Gently remove the plant from the container by turning it upside down and tapping it. Catch the root ball as it slides out. Cradle it in both hands. Avoid holding the plant up by the trunk or stem. Find an attractive front or the “face” of the plant if positioning matters, and set it in the hole, eye-balling the collar to make sure it will be high and dry after you replace the backfill. Make sure the plant is straight and presentable.
Start replacing the backfill (amended or not, it’s your call) into the hole around the roots. Tamp it down and firm it with your fingers or a little stick, but do not pound it down with the shovel handle or stomp on it. You can add water as you fill the hole so that all the backfill will be consistently moist. Finish filling in the planting hole making sure that the collar is not buried.
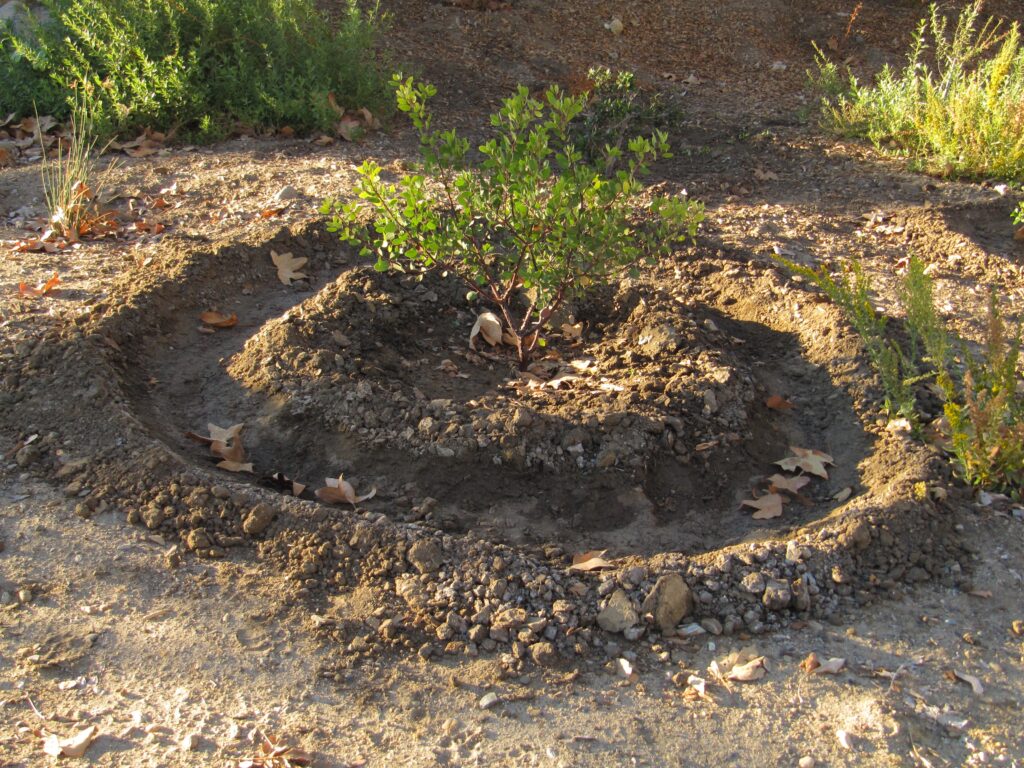
With the excess backfill, form a basin by building a berm well outside the dimensions of the hole so that rainwater and irrigation water will be concentrated into the root zone.
Add organic mulch approximately 1/2” deep in the area inside the berm so that the edges of the root ball are no longer exposed. The collar should still be visible slightly higher than the mulch.
Watering In: Each plant should be watered as you replace backfill in the hole, or by filling the basin with enough water to soak to the bottom of the hole. You cannot depend on a spray-head sprinkler system to thoroughly water a new planting the first time.
Wildflower Seed Mix: After all the plants are planted, you can sow wildflower seed over the entire area. Since the flowers are seasonal, you must sow the seed in fall, winter or very early spring. The seed will germinate with the cool-season rains, the plants will grow through the winter, and the blooms will appear in spring.
Simply scatter the seed with the old “feeding the chickens” toss, throwing the seed across the ground sidearm. Caution; it is very easy to sow too much seed. Test your technique. The seeds should be somewhat evenly spaced on the ground, approximately 2-3 inches apart. You can lightly rake the area to cover the seeds just under the surface, or apply a thin layer of clean, organic mulch, as described below.
Establishment Period
Watering: During the first dry season, you should water to provide for healthy plant survival and growth, and to encourage deep rooting. As a general rule, you should irrigate approximately every week or ten days. This is called the interval. Whether you water by hand, with a portable drag line or with a permanent sprinkler system, you need to apply enough water for deep percolation into the soil. The length of time that the sprinklers are on is called the duration. Watering at long intervals (infrequent irrigation) with long durations is much more effective than irrigating using frequent intervals and short durations.
Many of the modern irrigation controllers used on fully automated systems are called “smart” timers. They can be programmed to recognize rainy periods, and usually include sensors to monitor soil moisture. Some have special operating modes for native plants and include adaptations for the early establishment period.
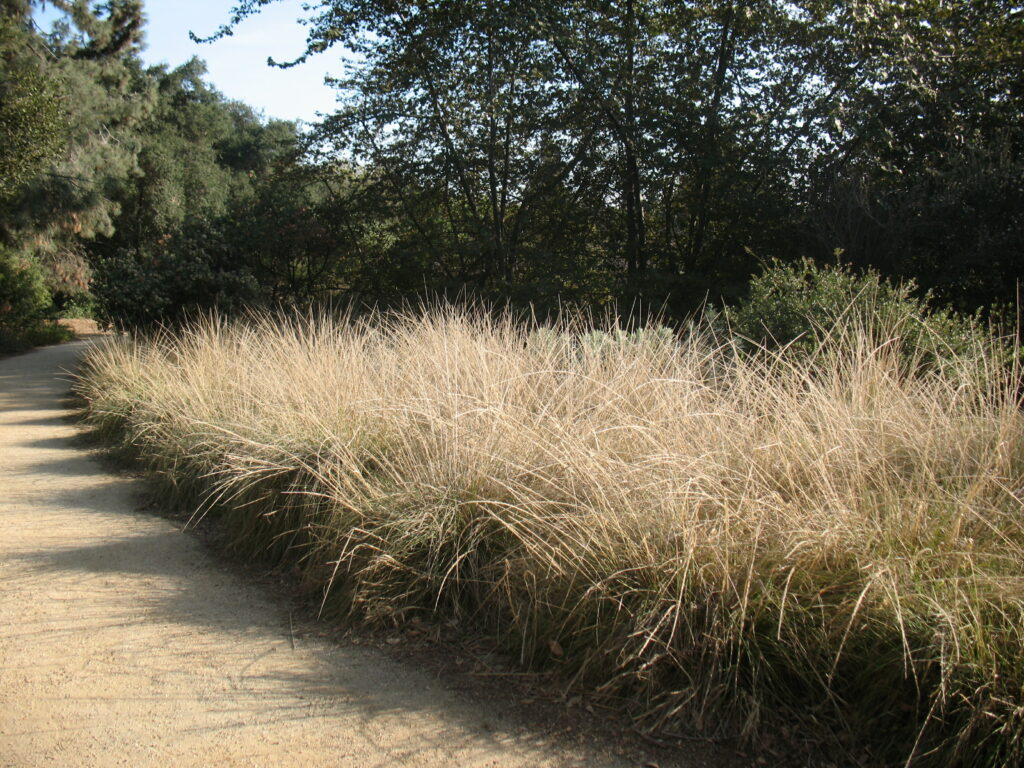
Mulching: Apply clean; weed free, well-composted organic mulch to the area around the plants, or to the entire site if practical. This will help cool the soil, retain precious soil moisture, keep weeds to a minimum, and strengthen the plants. Avoid “green” (fresh) sawdust and hot manure products. An inexpensive and sustainable alternative to the commercial products like bark or shavings would be composted urban green waste. Apply in late spring and early fall.
Fertilizer: Most native plants are cool season growers. It is more important to build long-term soil health than to periodically and artificially pump up the plants with commercial fertilizer. If the plants need a little boost because the soil is particularly poor, use an all-purpose (preferably organic) fertilizer for cool season feedings (October – May). One light application in mid-summer will help get the plants ready for fall growth. The rates recommended on the bag can be reduced to half strength for native plants. Remember, weeds also benefit from the plant foods you apply. Use fertilizer around each plant rather than spreading it over bare soil.
As noted above, Tree of Life plants readily adapt to their new homes in the landscape, as they are not over-fertilized in nursery production. You can check the ratio of branches and leaves to roots plus the internodes (the stem length between leaf shoots) to determine if the plant has been properly fed in the nursery. Tree of Life plants always pass the test.
Initial Pruning: Very little pruning is required during the first year establishment period. Fast growing plants like the sages might benefit from a little tip pruning after flowering to provide good shape.
Troubleshooting: Things to watch for during the first few months: Dry plants or over watered plants (water management), damage from gophers, rabbits, ground squirrels and other plant predators, insect damage including aphids, thrips, scale, whitefly, snails and slugs, and plant diseases (usually caused by waterlogged soils, over-watering).
Care and Maintenance
Watering:
Native plants require much less water than conventional (exotic) garden plants. In many situations, plantings can get by on seasonal rainfall alone. However in most landscape settings, dry season irrigations will maintain the plants green and healthy and keep the leaves turgid (full of water).
The interval between irrigation events will vary depending on your climate and soil type,and the duration (the length of time you leave the sprinklers on) will be governed by how readily your soil will absorb the water. You need to water with long durations at long intervals in order to provide consistent, deep moisture to the root zone. Do not allow the ground to remain soggy for long periods of time in the summer, as this encourages disease. Avoid overhead irrigation (wetting the leaves for a long time) during the hot part of the day in the warm season.
After the plants are established, one deep irrigation every two to three weeks is sufficient in summer and fall. In mild areas near the coast or in heavy soils, watering once a month is enough. Less frequent irrigations are required in the spring. During the winter, rainfall alone is adequate. In extremely dry years you can supplement the rains with carefully timed cool season irrigation.
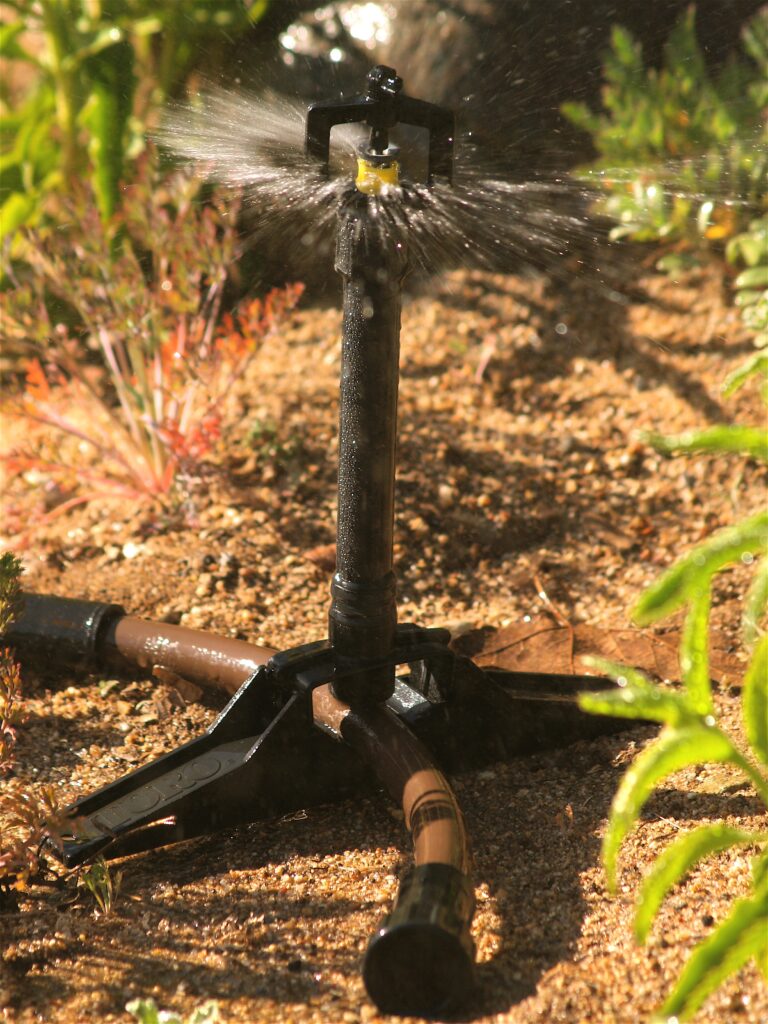
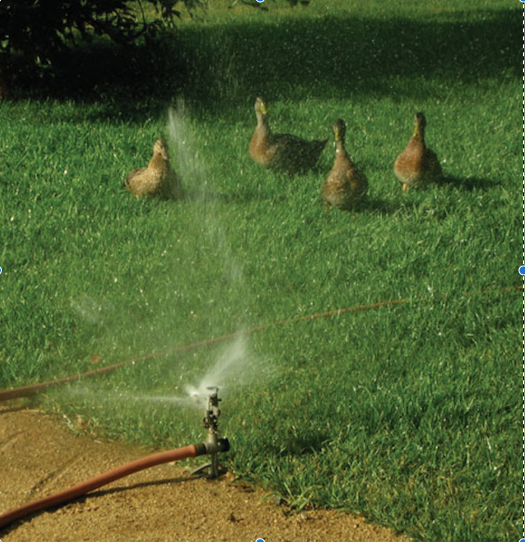
The ground in a large circumference (approx 18′) around the sprinkler is wet after several hours of running the sprinkler. You can set these sprinklers up with several on a long line, or simply relocate the single sprinkler to water a larger area.
Mulching: You can continue the mulching program described above under “Establishment period.” As the plants mature, the trees and shrubs will start providing their own mulch of fallen leaves, flower parts, and other plant “litter.” This is good for the plant and provides habitat for beneficial insects, birds, and other species. A fully developed native landscape is self-sustaining as far as mulch is concerned.
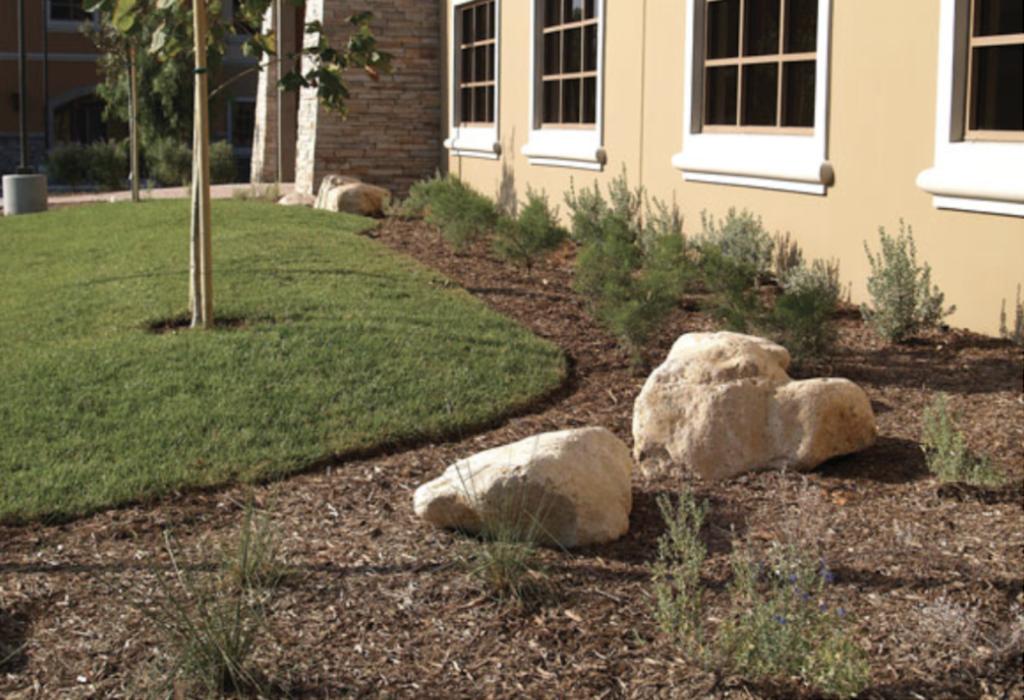
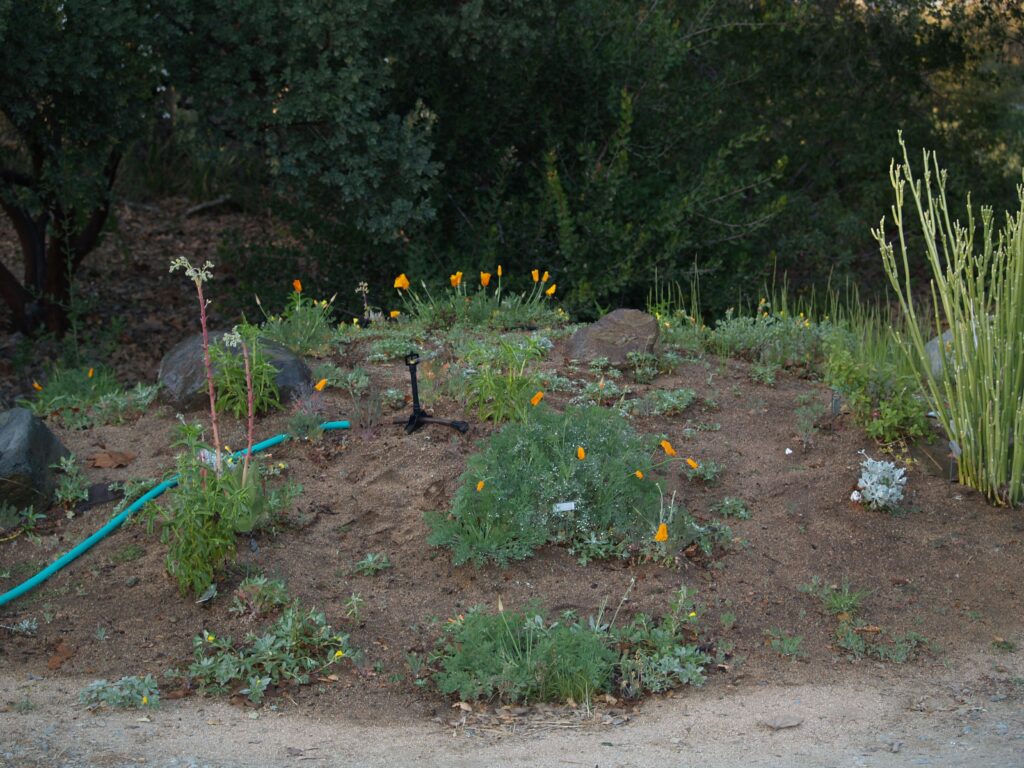
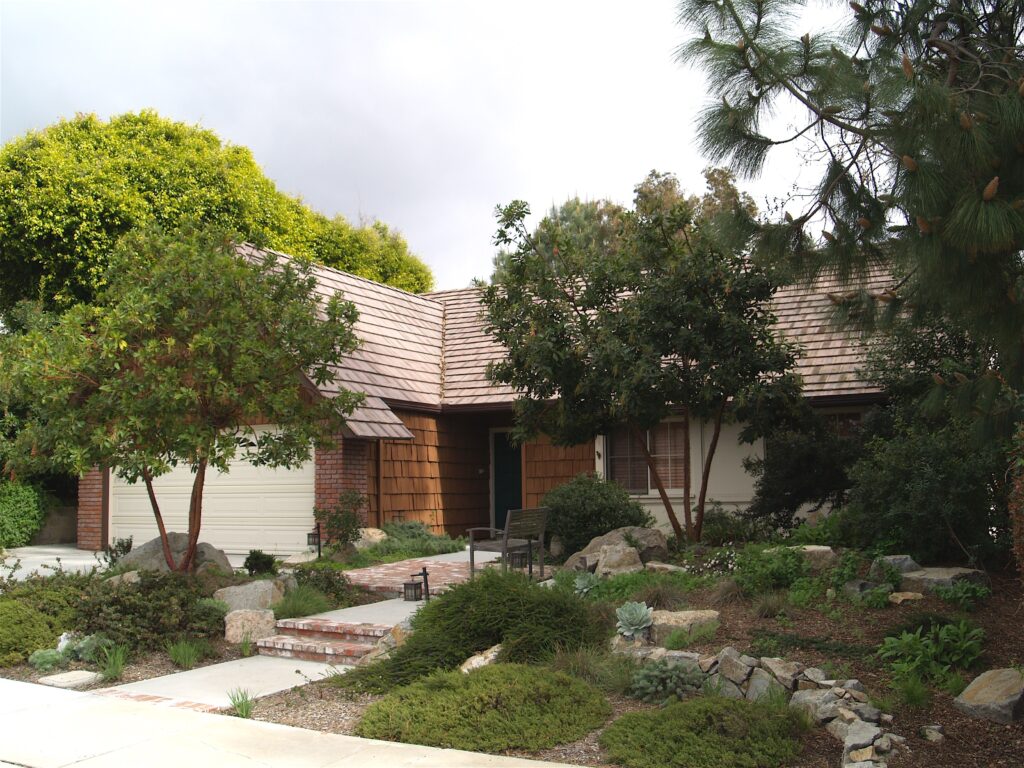
Note the plants, properly spaced, boulders and rocks for natural effect, organic mulch covering the bare ground and mini-sprinkler (plastic riser) in foreground. The plant with white flowers near the center of the photo is Ceanothus ‘Popcorn.’
Fertilizer: A mature native plant garden requires little or no supplemental plant food. If you want to add to the strength of the soil and provide for healthy growth and seasonal flowering, use a light strength, all-purpose organic fertilizer in fall and again in late spring. The rains will soak the plant food into the soil.
Pruning: Over time, your garden’s appearance will improve dramatically with artful pruning. On the flip side, we have all seen landscapes that were virtually ruined by unskilled hacking.
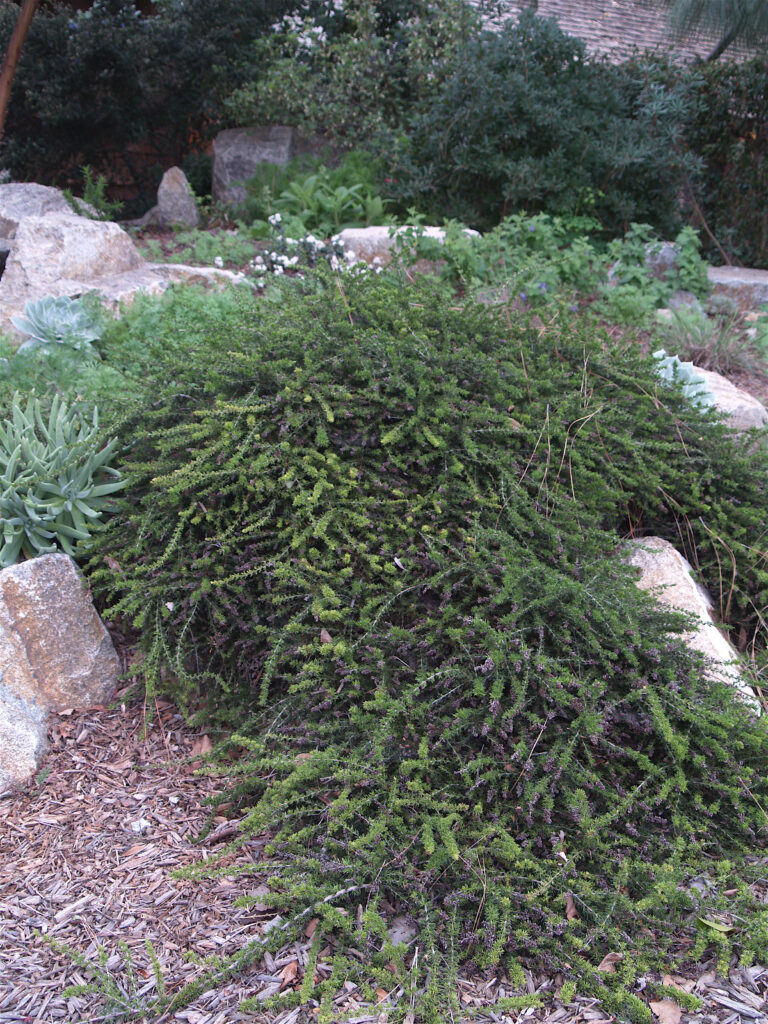
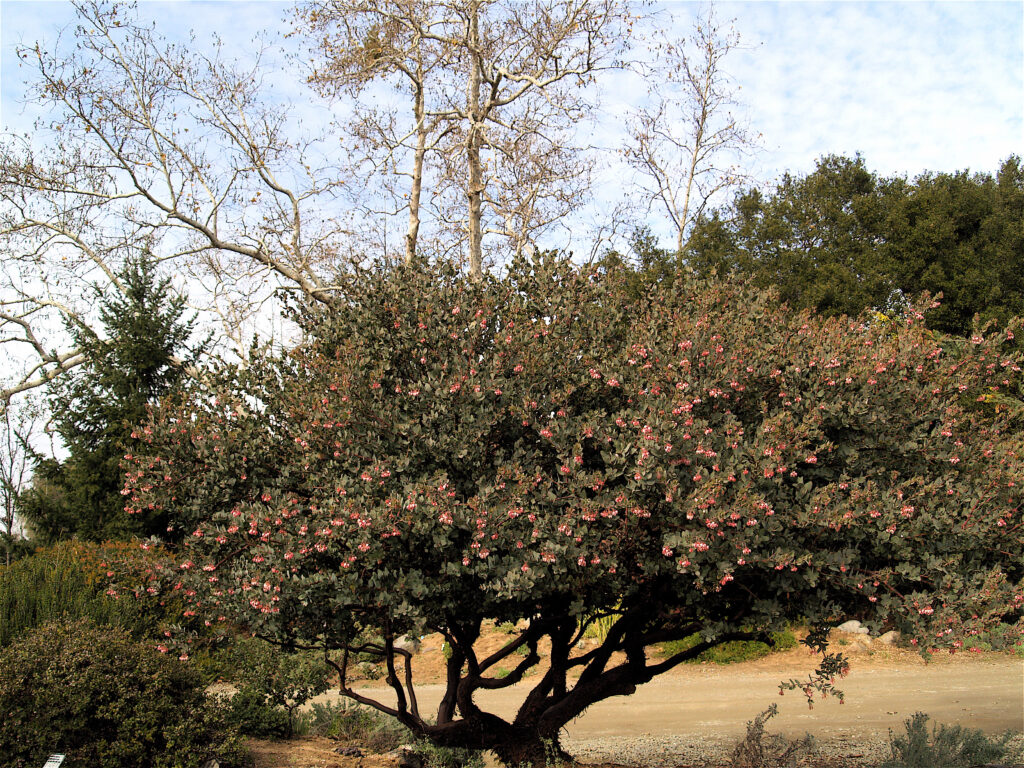
You can direct the future growth of trees by removing branches heading down, and those that are crossing and those that are redundant (parallel). As shrubs mature, you can expose their beautiful stems and bark (i.e.; manzanitas) by lifting up their canopies, pruning lower branches and thinning their centers. Faster growing shrubs like ceanothus and coffeeberry can be tip-pruned after flowering (the way a deer would browse) to encourage healthy new growth and fresh flowers every spring. Screen or hedge plants can be shaped, shrubs and groundcovers can be headed back so that they do not grow into each other, and low growing plants can be kept to the desired height. Woody subshrubs such as sage, buckwheat, and coastal sunflower will benefit from an annual pruning at the beginning of the fall season. Like other perennials, California fuchsia will be rejuvenated by pruning it when it is finished blooming.
Dead wood should be removed anytime. Cut the dead branch back into healthy wood if possible. As a precaution for not spreading disease, you should sanitize the shears and saw by dipping or wiping them in a 10% bleach solution, (9 parts water to 1 part bleach) between cuts.
Troubleshooting:
As a general rule, native plants are remarkably free from pests and disease in the landscape. Most potential problems can be averted by good watering practices. Root rot disease is brought on by waterlogged conditions, present in the root zone during the summer months.
As plantings mature, gophers, rabbits, ground squirrels and other plant predators become less of a problem, as the plants are generally more resistant. Unless the damage is extensive, deer and other browsing animals are more a delight than a problem; in our urbanized world they appreciate your Ceanothus as much as you do.
Plant eating insects can be controlled with natural products such as neem oil and insecticidal soap. Avoid using chemical sprays, whenever possible, because they upset nature’s balance and kill beneficial insects as well. With all sprays, always follow the instructions on the manufacturer’s label.
The problem of weeds diminishes over time as well as their seed bank depletes and conditions are less favorable. The native plant cover sustains itself, and as stated above, a mulch layer will help reduce weed competition.
Special Situations
Extreme Sun: Obviously, you have to choose plants that will grow in the conditions found at the site. In harsh, bright, dry, windy situations, you can provide temporary protection on the south side of each plant by building a little shade fence using shade cloth, or sticking a fan palm leaf in the ground, or weaving a little mat out of cattail leaves. Be creative. It is the brand new planting that is most vulnerable to sunburn, baking or drying out. Plant in the cool season or on cool days to reduce initial stress.
Deep Shade: As in “Extreme sun,” you have to choose the right plants. Shade under trees is much different than shade from buildings. It is easier to maintain plants in diffused light of trees. Dense shade from buildings may cause plants to lean towards the light and grow spindly. Water management is critical, as the area will not dry out very fast. Insects like mealybug can be a problem on weakened plants in areas of poor air circulation.
Slopes: Installation on slopes is often difficult, especially if is a cut slope or compacted fill. The conditions for healthy plant growth are not there. Choose tough plants. Follow the instructions above for site prep, soil prep and planting. Low volume (mini-sprinkler) irrigation is best for good penetration and minimal to zero run-off. Maintenance becomes easier as the entire planting matures and can be managed as a unit, rather than as many separate plants on a single site.
Wet Areas: There are differences between soil that stays moist, boggy, wet or stagnant and a stream bank with flowing water conditions. As in the other special situations, you have to choose the right plants. In many cases, the wet area is intended to serve as a bioswale. The plants will purify the run-off that flows through them by utilizing the nitrogen and other elements, and catching small debris. Bioswales, bogs, and stream plantings quickly become extremely important habitat areas. Any drastic change such as pruning or mucking the mud out will temporarily destroy habitat. The system is very resilient and the plants will grow back. If drastic maintenance procedures are to be done during the growing season, you should do one section at a time, and give each section time to grow back before doing the next. That way the beneficial insects and other wildlife species will not be extirpated from the site.
Long Term Considerations
Plant Longevity: In any maturing landscape, you will need to remove or replace some plants as they die or grow out of their prime time. Many of the fast growing subshrubs and herbaceous perennial plants give a good show for the first 5 or 10 years. As they start to become old and woody, they can be pruned, mulched and fertilized (see above) and finally taken out. Usually by that time, they will have served their purpose for quick fill, color, screening or ground cover, and the other long-lived plants will be coming in. It may be time at about 15 – 20 years age, to change the overall theme, after pruning, shaping and removing plants and looking at the new opportunities in a mature landscape. It is likely that shade will be an issue to address in an older landscape.
Replacing Plants or Adding New Ones: If a plant dies or you remove plants for any reason, it is easy to plant new ones in their place. The rainy season is the ideal time, and by following the guidelines shown above in “Planting”, you will have no problem establishing new plants in a mature garden.
Mature Plants Providing Shade: As trees and shrubs grow to large proportions, you will have new opportunities for planting in their shade zone. No need to overdo it though. Part of the unique beauty of a native plant garden is its simplicity. Leaf mulch and bare earth are valuable components for backyard habitat. In the shade created by mature plants you can put a few coral bells, a grass, iris, currant, or fern. You do not have to cover all the ground. Let the shadows and branch patterns play among a few select shade plants or a couple interesting rocks.
Rewards
Authenticity, Efficiency, Sustainability: A well maintained native garden has the look and feeling of a natural scene, concentrated and tended in a relatively small space. The garden functions as a whole, rather than as a collection of separate parts. Plants begin to grow together to provide mutual benefits. Some begin to set seed which germinates close by and adds to the natural appearance and function. The garden is not of artificial design, intent nor constitution. Native plants, properly used and tended in the landscape provide an authentic, efficient and sustainable experience for everyone. In more ways than one, a native plant garden is “regenerative.” It will self-sustain and some plants will reproduce on site, but more importantly, you will be “regenerated” by your own experience in the garden throughout the different seasons.
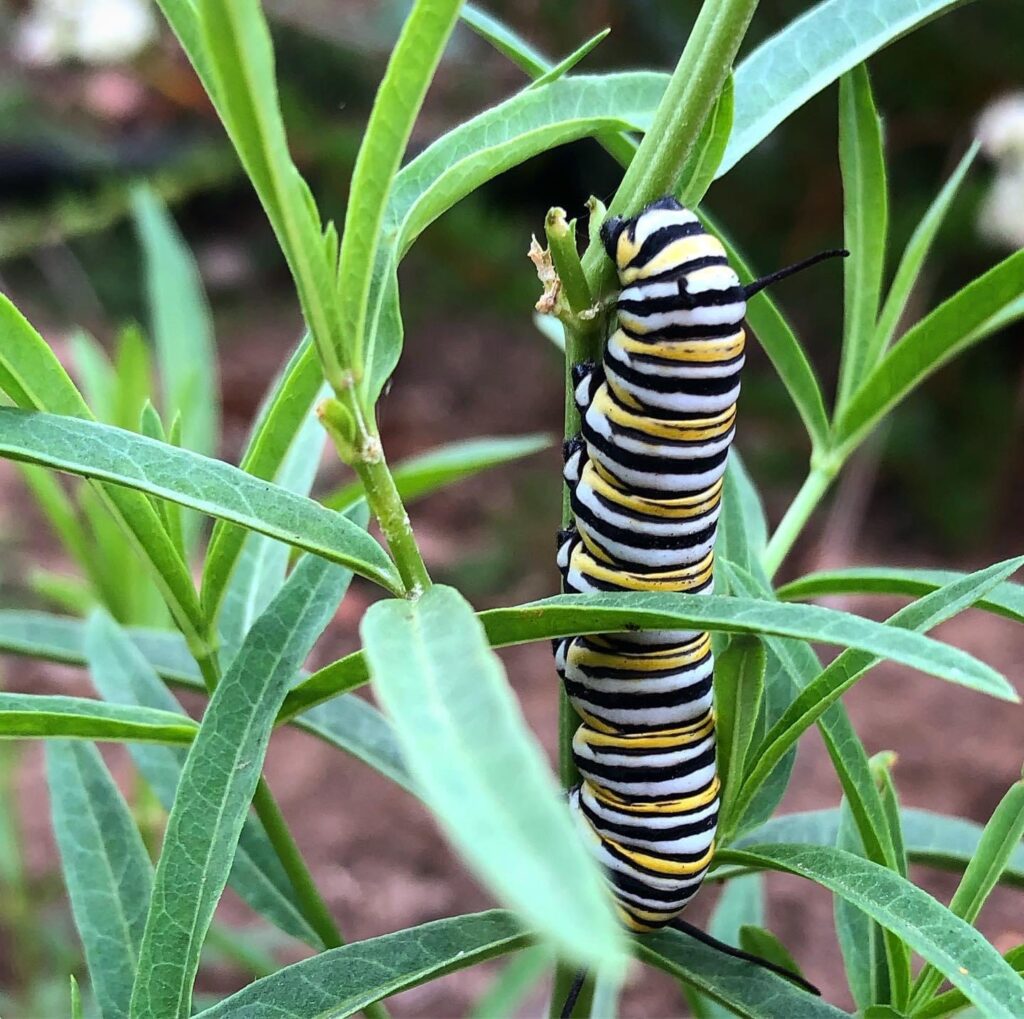
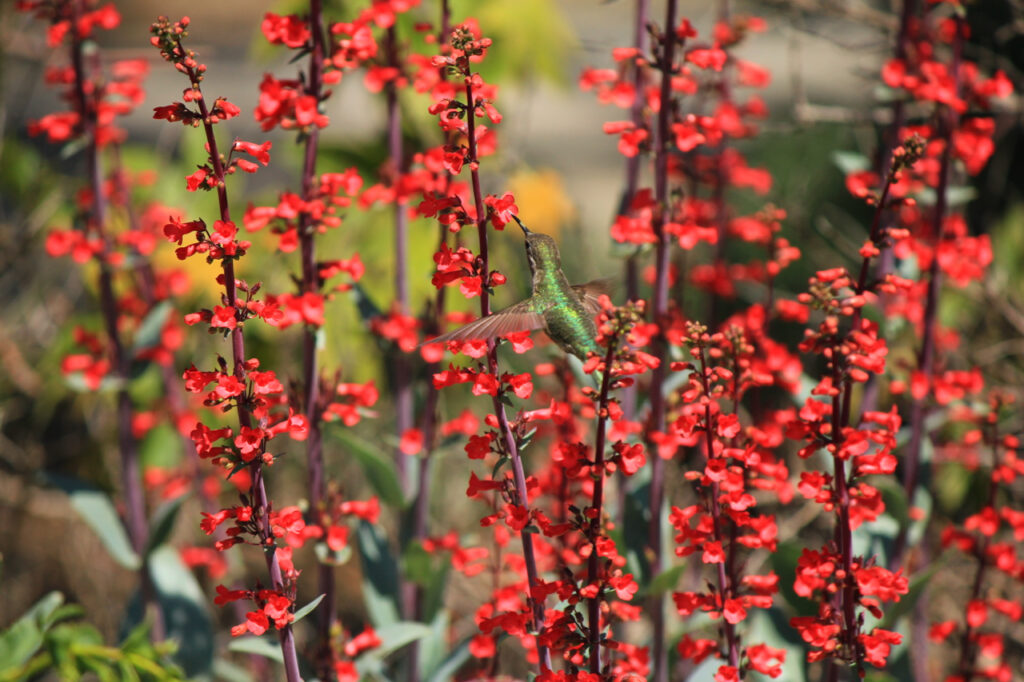
Habitat Garden: Taking care of a native garden to attract birds and other wildlife species requires that you maintain it to your standards of beauty, without excessive (artificial) input. Follow the guidelines discussed above to keep an attractive, healthy garden… but leave a little “wildness” for our fellow mortals (John Muir’s affectionate term for wildlife). They need a water source, food (berries, seeds, nectar, grubs, worms, insects, etc.), cover (canopy, branches, safe sites) and nesting materials. Because the tasks outlined in this discussion are both seasonal and of very low impact, you will be actually observing wildlife in the process, rather than chasing it away with noisy machinery and toxic chemicals.
Engagement:
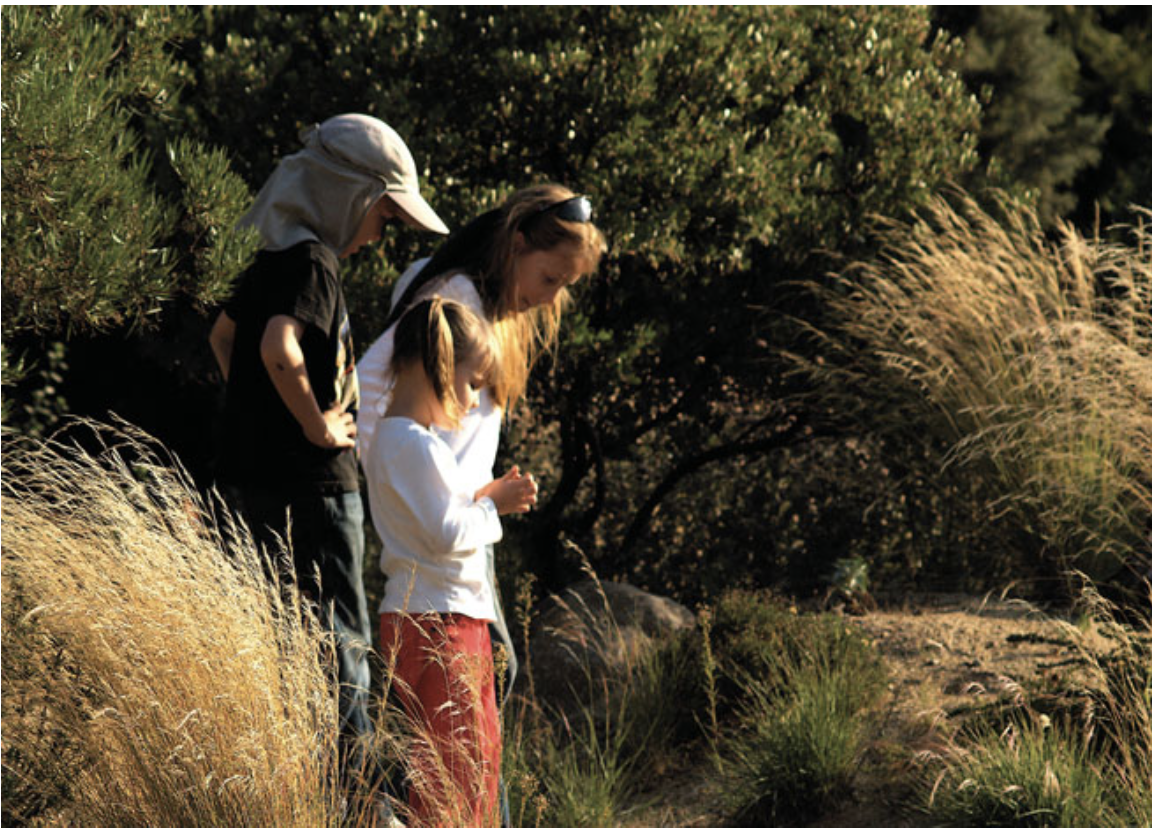
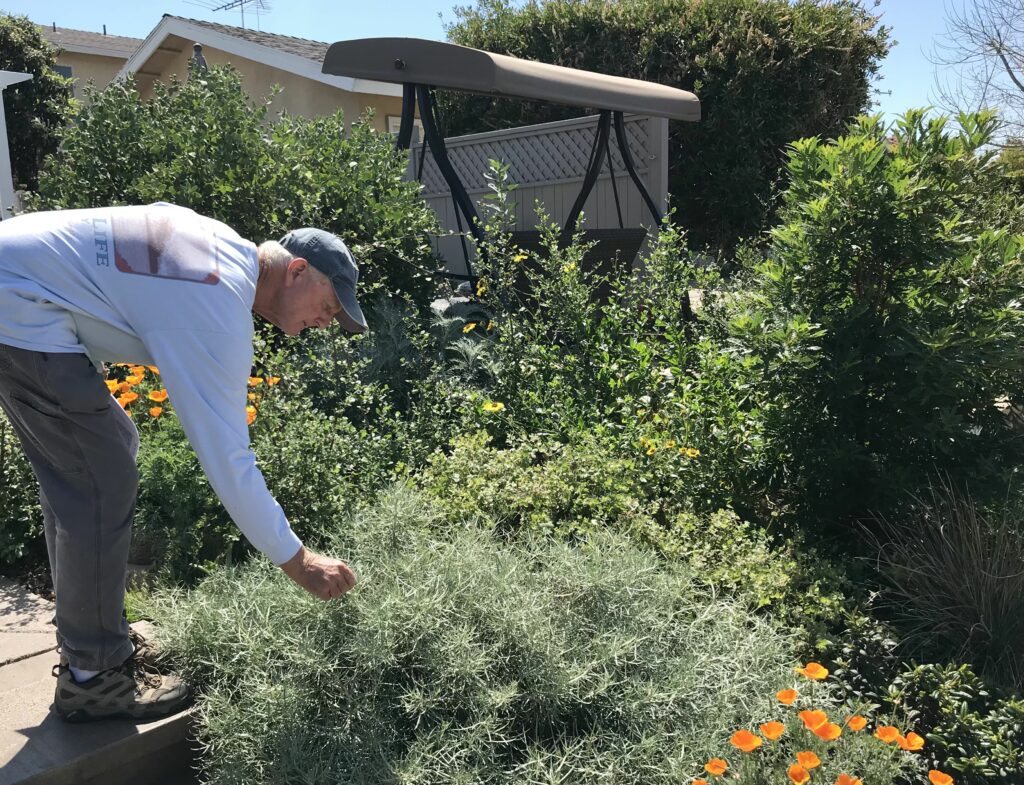
Planning and planting a native garden are in themselves, satisfying endeavors, but nothing takes the place of enjoying time in the garden. The typical “chores” of watering, weeding, pruning, and caring for the plants actually become more about time engaging with the place in any given season.
You can forget the idea of “Gotta get this job done, so I can go play”. Those reflect the old days of lawns and flowerbeds. Your time outdoors in a native garden gives you a chance to see all the patterns of nature, up close and personal, in what is essentially your habitat too. And the work itself… somehow seems a lot more like play.